
In our last tutorial on decorated letters we focused on using buttons, diamantes and some glue moulds to create an impressive layered effect. This time, we’ll just be using shells and glue moulds to decorate our letter in a more minimal way. It’s incredibly easy and looks great – but don’t take our word for it, give it a try!
Getting started
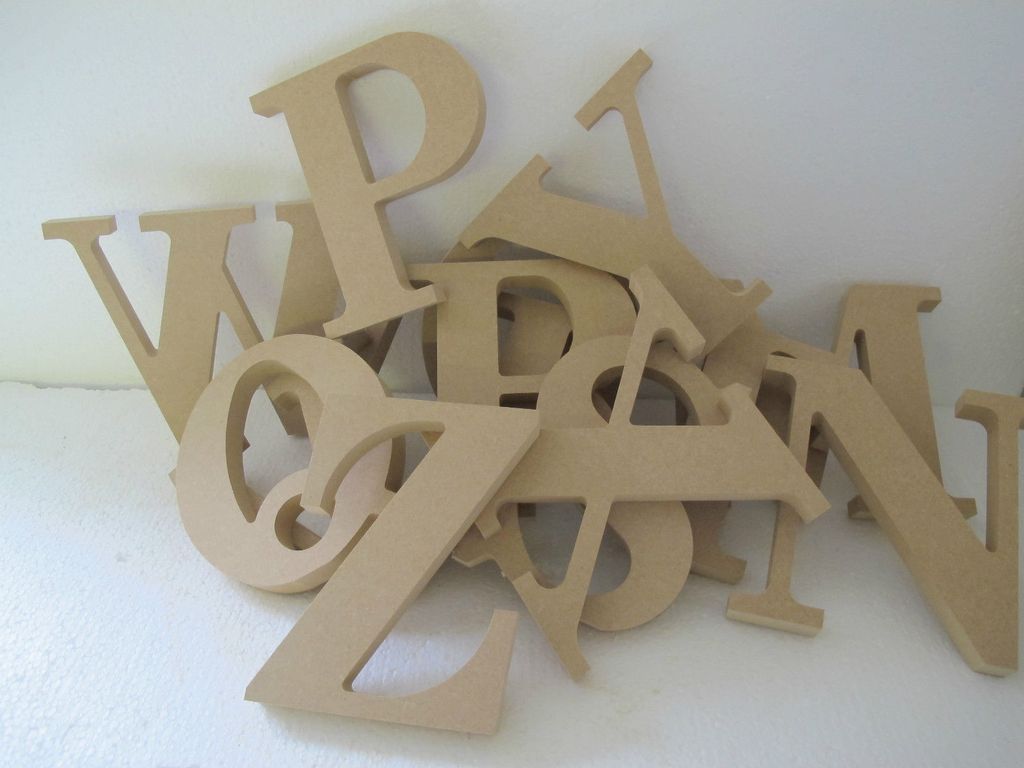
As ever, you’ll need to gather your materials first:
- Plain wooden letters
- Primer & a paint brush
- Tweezers
- Spray paints in colours of your choice (we’re using white and silver)
- Some small shells & pearl decorations
- Silicon moulds (yes, we know we keep banging on about it, but this really does have to be silicon. Other plastics just won’t stand the heat of the glue. See our hints & tips for more information)
- Tecbond 240-12-250 clear glue (although you could use 240-12-200 coloured glue instead) and a glue gun (we’ve used the compact and lightweight tec 305)
First thing’s first: before we spray paint anything, apply the letters with one or two coats of primer. When the primer is completely dry, spray paint your letters with your first colour, taking care to follow the instructions on the back of the can. When you’re happy that you’ve got the right coverage of paint, leave the letters to dry completely (again, it’s always a good idea to refer to the back of the can for details on how long the paint takes to dry thoroughly, and not just to the touch).
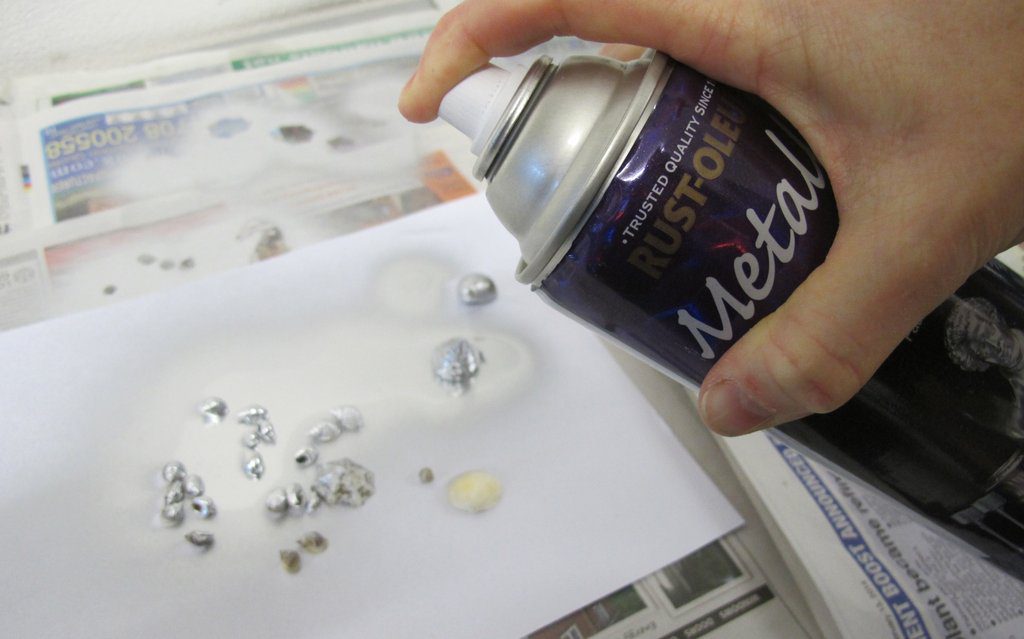
While you’re waiting for your letters to dry, spray paint your shells in a second colour (this is messy, so we advise putting them on top of some newspaper or a tec mat while you spray them). Once these are coated, leave to dry, and start on the moulds.
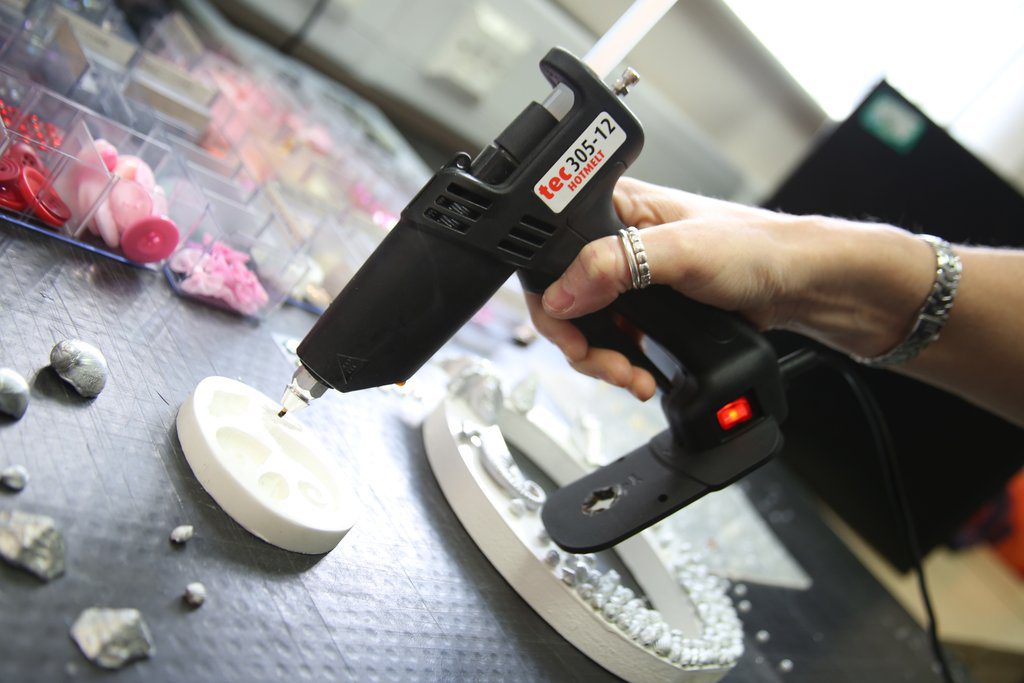
We’ve kept with the ocean-theme and chosen moulds of seahorses and starfish. Simply fill the moulds with glue, wait while it solidifies, and release when dry. When they are completely dry, spray paint these with your second colour as well (although you could also use coloured glue for these).
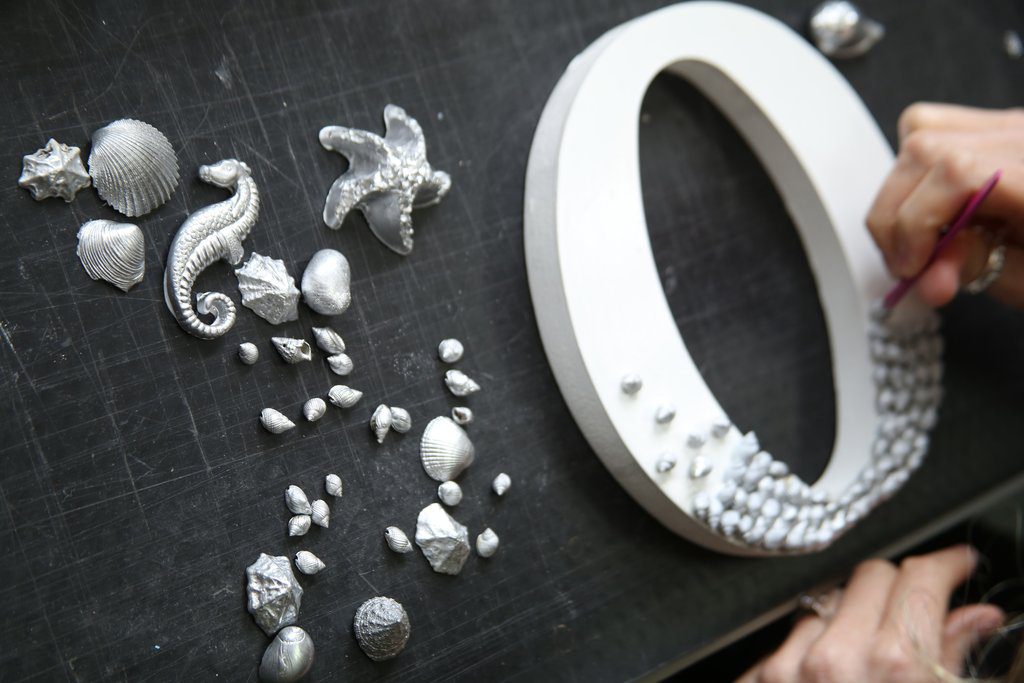
Once your letters and decorations are all painted and dry, you can begin decorating. It’s a good idea to arrange your shells and moulds on the letter to make sure you’re happy with the pattern before you stick anything down permanently. We’ve positioned the shells closely at the bottom of the letter, with a few further apart near the middle.
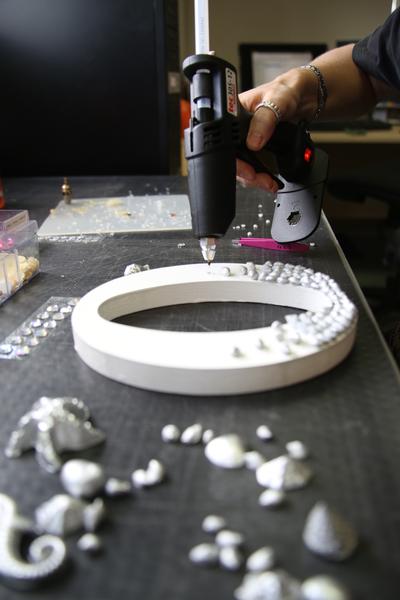
This can be quite fiddly, so we’ve used tweezers to place the shells, and the precision nozzle to apply the glue with as much accuracy as possible.
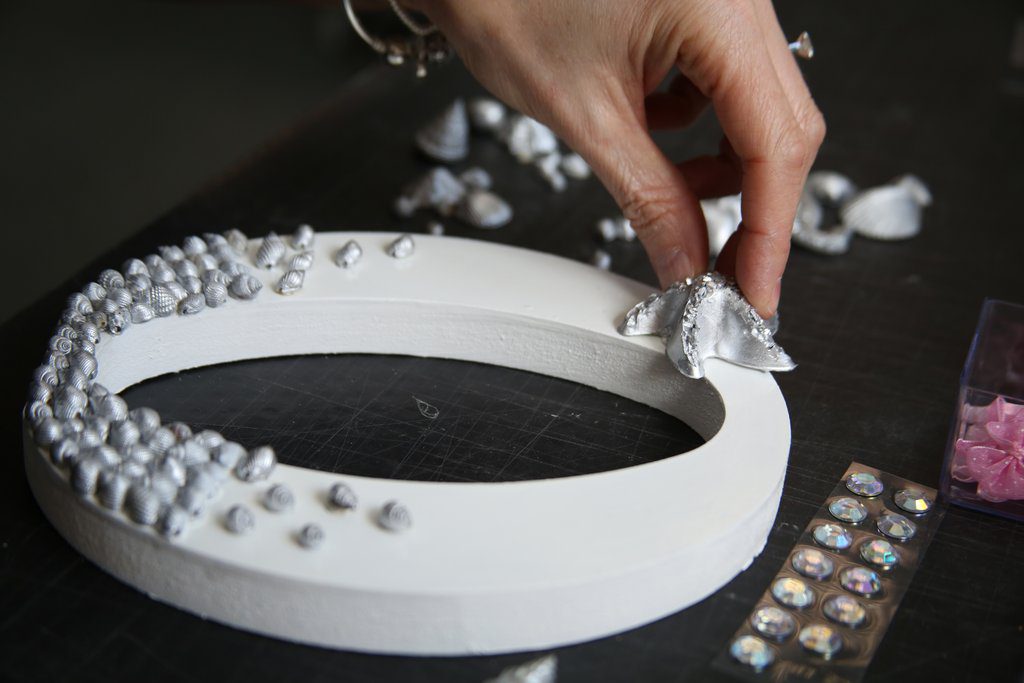
You can then glue your moulds on (we’ve placed these near the top of the letter).
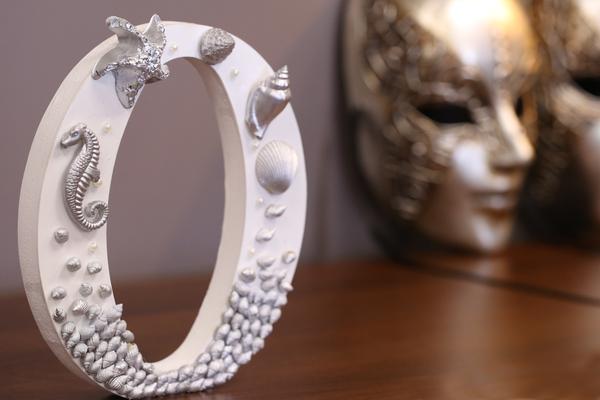
Allow a couple of minutes for the glue to dry completely and – yay! – you’re done.

New website changes

Craft Glue Gun Dos & Don’ts

Leave a Reply