
Make your own shaped fridge magnets in minutes with our quick and easy tutorial.
Getting started
To make your own magnets, you will need:
- A silicone mould (we’ve used hearts here, but other shapes should work just as well)
- A glue gun (like the trusty tec 305 that we’ll be using)
- Crucially, some magnets
- Coloured glue (we’ve used more than one colour for some of our magnets, but it’s entirely up to you)
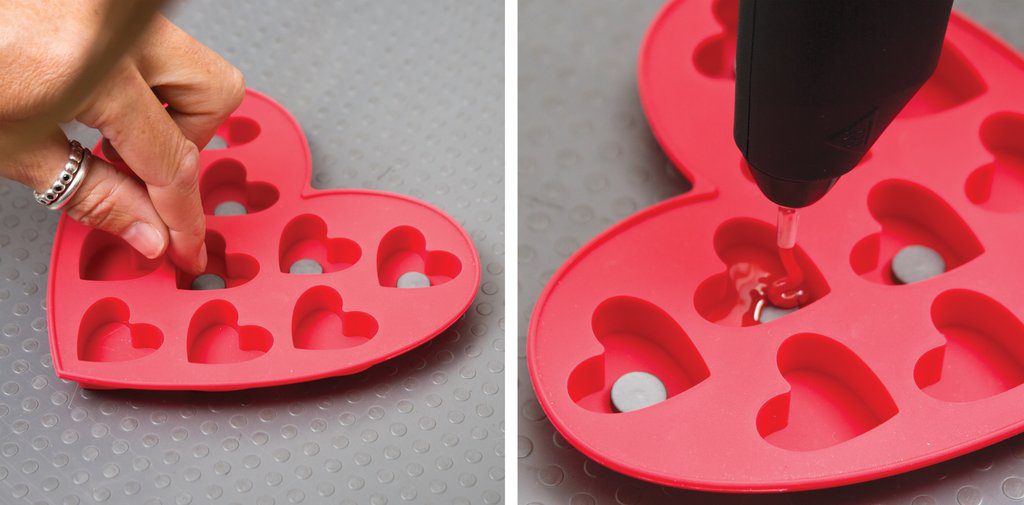
Begin by putting a magnet into the bottom of your empty silicone mould. Making sure this is placed in the centre, fill half of your mould up with glue. Try to get the coverage as even as you can, ensuring that the glue is flowing into the corners so that you are left with a smooth finish when the solid glue is released from the mould.
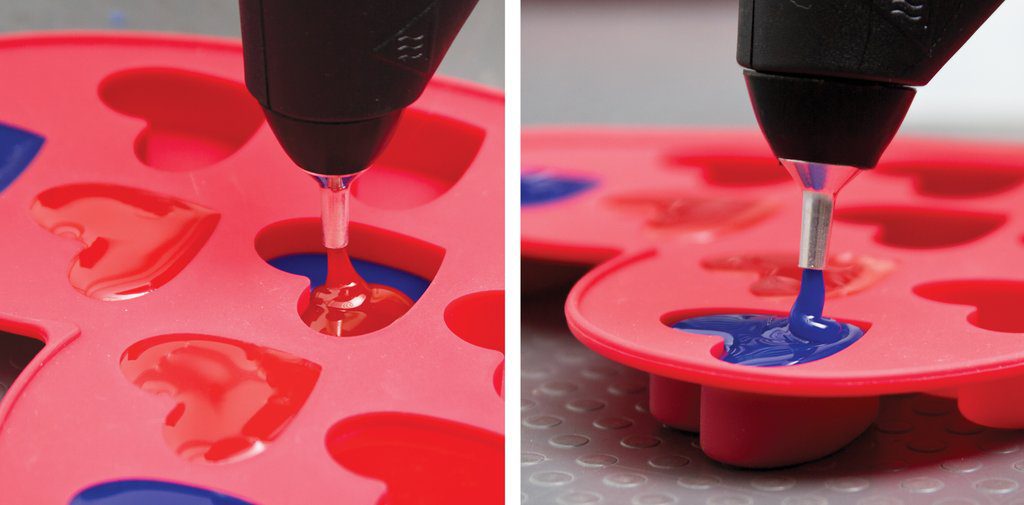
Allow this first layer to dry completely (this should take about 5-7 minutes depending on the thickness of the glue), and fill the rest of the mould with a different coloured glue.
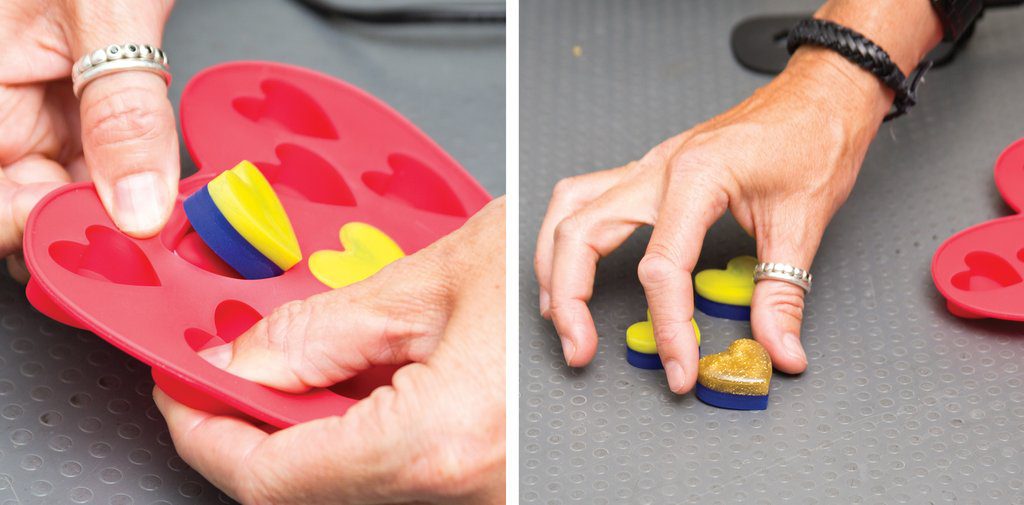
Once this top layer of glue is completely dry, you can release your magnets from the mould.

And that’s it. Seriously simple.

New website changes

Craft Glue Gun Dos & Don’ts

Leave a Reply